Tile and Stone Maintenance

Category: Tools

When is a sponge not a sponge? – When it is a Sealer Sponge

Ok, so I thought a sponge was a sponge, but of course I should have known better. For some years now we in the tiling world have had hydrophilic sponges – sponges designed to be highly absorbent for maximum clean-up performance when grouting. They are a little more dense than a standard sponge, such as you may use for washing a car for example. But they do not make good applicators for sealers. The reason is each squeeze of the sponge causes sealers to foam up and this should be avoided. Also, most normal sponges will not hold the sealer and therefore drip it out all over the floor as soon as you lift it out of the sealer container (assuming you are using a paint tray of course), so you have no control of the flow. The hydro sponges on the other hand don’t let enough sealer out.

So I have never been a fan of using a sponge to apply sealers in general (save the sponge brushes which can be useful for grout sealing). Similarly, I tend not to recommend the use of rollers (whether sponge or fleece), but this has as much to do with the way that rollers can put too much product down and also of course there is the rolling action itself which can cause unwanted splashes.

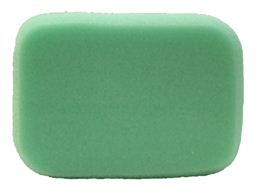
My preferred method for the application of most sealers is a good quality paint pad, they seem to hold just the right amount of product and let it out evenly. However, I have just discovered Sealer Sponges, designed to hold sealer and let it out when you want it to. I have tried them and have to say I am quite impressed. I would still use paint pads for larger jobs but these are great for the little jobs. They are especially good for applying coating sealers with nice, flat even coats.

High quality Sealer Sponge

High quality Sealer Sponge

Copyright Ian Taylor and The Tile and Stone Blog.co.uk, 2013. See copyright notice above.

What Is The Best Tile Cutter On The Market – Part 2?

So what do you do if you have a shape to cut out, like an ‘L’ shape around a window for example? Well, for that we need a wet-saw. It’s not just for shape cuts though, most stone will not cut on a manual scribe and snap cutter and will need the water-cooled, diamond cutting action of a wet-saw.Like the manual cutters, they come in many shapes and sizes and in all budgets; prices start from around £30 for anything remotely serviceable to, well in excess of £2,000 for professional models – quite a range. For most DIY jobs a small, sub-£100 machine can be quite adequate, indeed many tile fixers will opt for economy rather than quality, preferring to buy a new machine every 12 months (or less) rather than spending in excess of £500 for one that could, in theory, last them a decade or more.

So what are you paying for with the more expensive machines? Well the quality of the build for one, cheap machines tend to be constructed mainly out of plastic, which is obviously, far less durable than the metal. The quality of the diamond disc or blade is another. I would also argue that long-term, the accuracy of the ‘professional’ machines is inevitably better, allowing for greater consistency in cutting. If you are looking for a solid, reliable mini-wet say that will cut a variety of materials (and last a while, with the comfort of knowing that you can get spare parts) then I would recommend a mid priced machine such as:

The Raimondi Supereco 98 Tile Cutter

Then there is the issue of size, with stone floors in particular, but increasingly with modern porcelain tiles, small cutters are just not capable of handling the large formats that we are buying. Larger tiles and slabs (because that is what they are becoming) mean larger cutters, if you have a tile that is 600 x 300 mm, then you (or your tiler) are going to need a cutter that has a ‘cutting bed’ of at least 600 mm – obviously. The most popular type of larger wet-saws are known as Bridge Saws due to the system of a cutting head that moves over a static ‘bed’ via a twin or mono-rail over-bed bridge. With the larger frame of a bridge saw, it is easier to support a larger motor, hence we can have a more powerful machine, which does not have to work so hard, if you have ever tried to cut through very hard dense stone with a small, and underpowered saw, you will know exactly what I mean.

Many bridge saws have lots of other useful features, such as pumped water cooling (rather than just running in a trough of water that is quickly emptied, and being human, most people neglect the chore of keeping it topped up, hence run the disc too dry and dramatically shorten the life of the disc). Also they can often be adjusted for thickness, by lowering or raising the head, so enabling multi-pass cutting for thicker materials (such as worktops and pavers). Some have options for both fixed height and floating, which allows for plunge cutting in the middle of the tile/stone – this is great for cutting out square, or even round holes.

A great example of a very flexible (and not too big) wet saw is the Exploit 70 portable tile cutter.

Copyright Ian Taylor and The Tile and Stone Blog.co.uk, 2013. See copyright notice above.

What Is The Best Tile Cutter On The Market?

This is a very vague question, but a very common one. Of course there are many different tile cutters available and the price range varies as much as their size and shape. Choosing the right tile cutter depends on many things; are you looking for a professional model, or DIY? Is it for a one-off job or do you intend to undertake several projects over the next few years? What are you cutting, small ‘standard’ wall tiles or large format, hard and brittle porcelain floor tiles? And so on.Like so many things in life, with tile cutters, you get what you pay for and another phrase comes to mind: ‘horses for courses’. There are three broad types of tile cutter:

1. Hand scribers and breakers
2. Manual Tile Cutters (scribe and snap)
3. Wet Cutters

The first type look like a pencil and are really just tungsten-carbide tipped steel (or increasingly, plastic) bars, or they may have a TC cutting wheel (like a basic glass cutter) and really all they can do is scribe a line in glazed and unglazed tiles. These are readily available in tile and DIY shops and are inexpensive. To be honest, unless you are simply fixing some small, thin basic wall tiles, then you will not get far with one of these as after scribing the line, you then need to break the tile along the scribe and anything over 7 or 8 mm can be quite tricky to the untrained. Don’t bother with placing the tile over matchsticks, it is far easier to simply hold the tile at arms length and place you thumbs on the back of the tile and ‘snap’ it away from you (like a certain, chocolate, twin-biscuit bar that you may enjoy when taking a break).

Thin cuts, of say less than 2 cm can be harder with this method as there is not much leverage available to the fingers. Another popular DIY tile cutter, resembles a pair of pliers with a winged-anvil at the end. This anvil can be used instead of the hands and can handle most basic tile-cuts.

However, if your project is going to involve more than just a kitchen splash back then you may well be better investing a little bit of money to get something more substantial. I should also point out, that these ‘pencil’ and ‘pliers’ cutters cannot help with cut-outs for switch sockets, ‘L’ shapes and the like.

You could consider a manual scribe & snap type cutter. Typically these have either two rails or one central bar, along which a scribing handle is pulled, or pushed. There are a variety of breaking devices and anvils, some built into the handle, others use a secondary device. There are many to choose from with prices starting from around as little as £10 (for a small, plastic one) up to several hundreds of pounds for a metal, professional quality one, capable of cutting very large floor tiles. If your budget is sub £50, (and your tiles are not too large) then you will find a wide selection of these machines in any large DIY store or tile shop.

With the trend today to tile ever-larger areas, particularly so in stone, and also the growing tendency for these tiles to be in a larger format, then it may well be well be worth looking at something more professional. Again, there are many to choose from; ask any professional Tiler and most will be familiar with the following two brands: Rubi and Sigma. Typically they will favour one and not the other – I am happy using either but that is because I have experience of using them both and of having to swap and change regularly, with many people their preference comes from which ever machine they were brought up on, and got used to. They have slightly different methods of operation; let’s take a look at a couple of them:

Rubi Manual Tile Cutters

The Rubi TS 40 is one of the best-selling manual cutters in the country, its design has not changed much over the last 25 years, but it works as well today as it always has. It can take tiles up to 40 cm in length and is operated by pushing a scribing wheel, by means of a long handle along twin chrome rails. Once scribed, the operator lifts the scribing wheel clear and uses the second lever to operate the breaking anvil

Sigma Manual Tile Cutters

The Sigma cutters by contrast, operate by pulling the scribing handle towards you and then changing the position of the handle, to bring the integrated anvils into play. The anvil presses down and the sprung plates give way to reveal a central breaking bar, over which the tile snaps.

Either of these two machines will handle a wide variety of jobs, if I had to make a choice between them then it would probably be the sigma, but much of this is my personal preference for ‘pulling’ and not ‘pushing’. If the sigma style appeals but it is out of your budget, then there are a number of ‘clones’ on the market that offer much of the same performance at a lesser cost. One of the best of these would be the Raimo by Raimondi:

Raimondi Manual Tile Cutters

Well, that post was a little longer than I had intended, and I have not even started on ‘L’ shape and hole cutting, for that we need wet cutters, I will leave that for next time. Stay Tuned.

Copyright Ian Taylor and The Tile and Stone Blog.co.uk, 2013. See copyright notice above.
Follow
Get every new post delivered to your inbox
Join millions of other followers
Powered By WPFruits.com